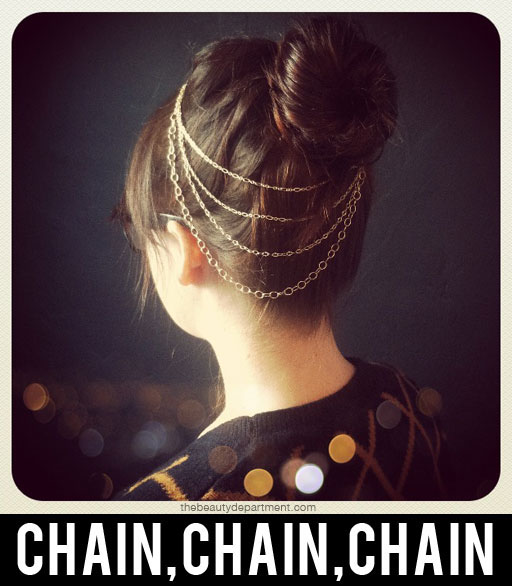
DIY HAIR NECKLACE
In this beautiful world of buns + top knots, we’re always searching for ways to mix it up. Today’s DIY helps us do just that! Making hair jewelry can be really fun & it’s very likely that you’ll have most of these supplies already at home! You can take apart an inexpensive multi-strand chain necklace that you don’t wear anymore, or if you don’t have that you can go to a bead shop where they sell chain and necklace making supplies. Here’s how I created this golden goodness:
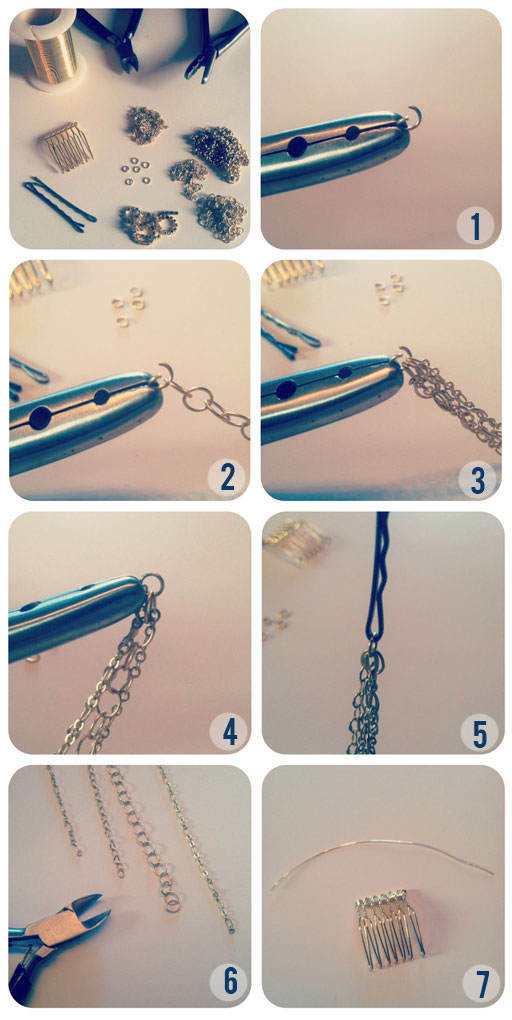
TOOLS: Wire cutters, flat-head pliers, thin gold wire, strands of necklace chain, a brass loop, a small hair comb + a bobby pin that matches your hair color. (FYI, all of the metal used here can be found at a bead store if you don’t have a necklace to take apart at home!)
- Open the brass loop.
- String your first chain on to the loop.
- Continue stringing chain until you have as many as you want on there. I only used 4.
- Use your flat-head pliers to close the brass loop back up.
- Slide your bobby pin through the brass loop.
- Cut your chains using your wire cutters. I cut each one about half an inch longer than the next. That way they have a draped look and fall about half an inch apart!
- Cut a piece of thin wire. You want to cut the wire about 3 times the length of your comb so you have enough to wrap. (see photo)
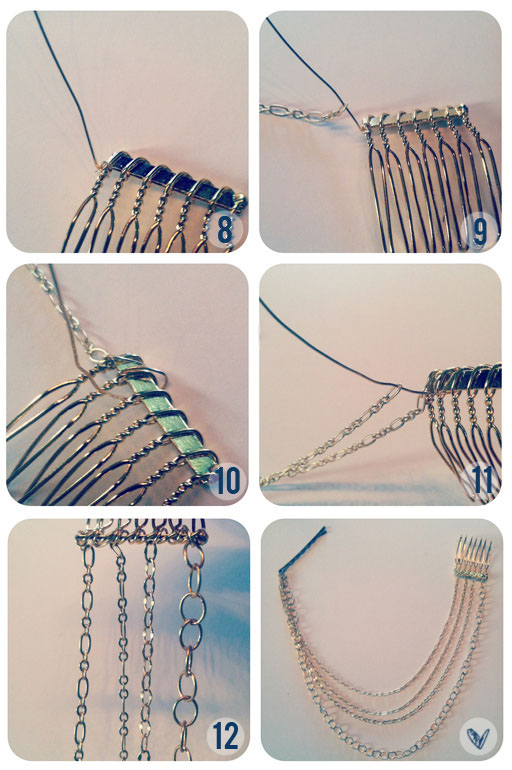
- Wrap your piece of wire around the first prong of your comb. I wrapped it three times to make sure it stays put! After you wrap it, tighten it using your flat-head pliers.
- String your shortest chain on the first loop.
- Now wrap your wire around the top of your comb and back under. Loop it around once or twice.
- Continue stringing your chain and then looping the wire around. You’ll want to go from shortest to longest so that the longest chain will hang the lowest.
- Once you’ve finished stringing your chains, tighten it off with flat-head pliers.


 //PART 2
0 comments:
Post a Comment